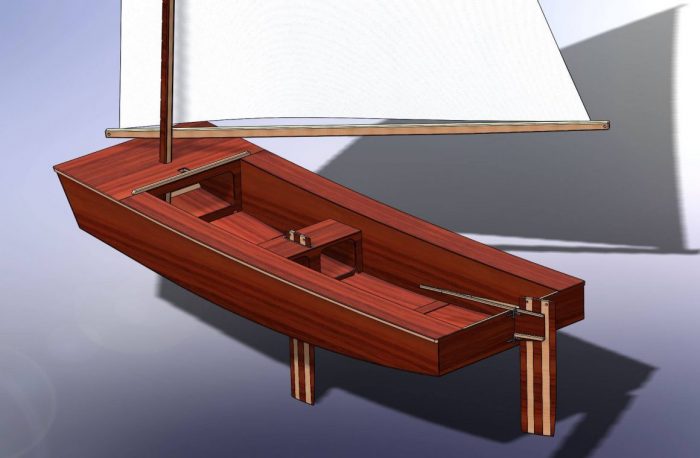
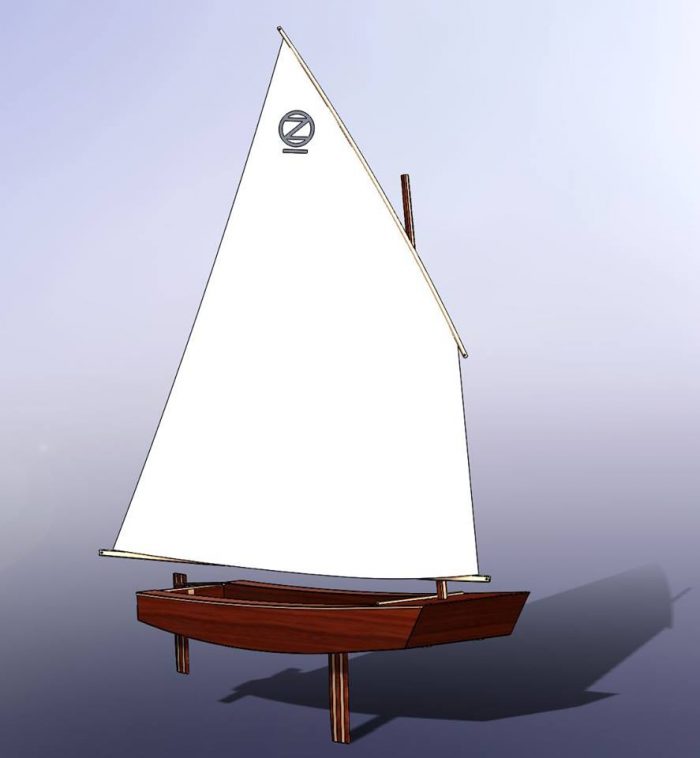
Some time ago on the Goose Facebook group, Ben Shaw produced some highly detailed drawings of the Oz Goose showing just how easy it is to build
This first one is just a taste – we will zoom in on details.
For information on Building and sailing an Oz Goose
- BUILDING VIDEOS -Our Step By Step How to Build an Oz Goose Sailboat
- Building the Oz Goose sailboat for peanuts
- Some of the sailing performance of the Oz Goose
- Video – one of our Regattas – 17 boats – this year 32 boats!
- How the Oz Goose goes together – CAD drawings
- Ropes sizes and Fittings needed for the Oz Goose and a Supplier
CAD drawings of each building stage – thankyou Ben!
I was looking over the group archives and realised the drawings give some viewpoints that would be highly useful to builders.
We have Goose builders in every continent and quite a few of the more significant islands as well 🙂
In essence it is a CAD Model of the Oz Goose. Ben was building an actual boat at the same time.
I know that building a model, even out of heavy cardboard is extremely useful for making details and the reasons for the comprehensive instructions in the plan much more tangible – particularly with builders so widely distributed around the globe and working with different languages.
So I have broken down his model drawings into sections.
Initial assembly of the plywood panels Oz Goose
I don’t have the early construction stages in the CAD model, but here are a couple of photos to show how the first steps go. All the plywood panels are put together dry to make sure it assembles accurately. – we use temporary screws driven in by a cordless drill. Then disassembled and glue put on the mating surfaces and reassembled again with the screws into the same holes.
The bulkheads go between the airtank faces.
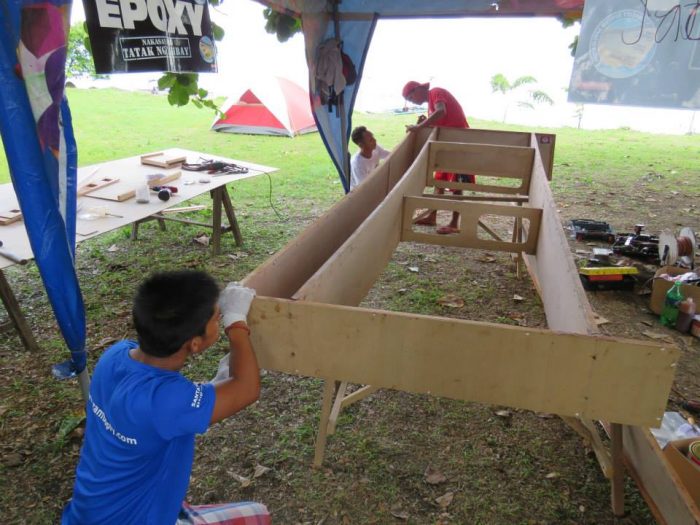
The outer hull sides go on. By the way, the photo above and below are our first 10 boat build beside Taal Lake in the Philippines. A wonderful sailing spot an hour south of Manila.
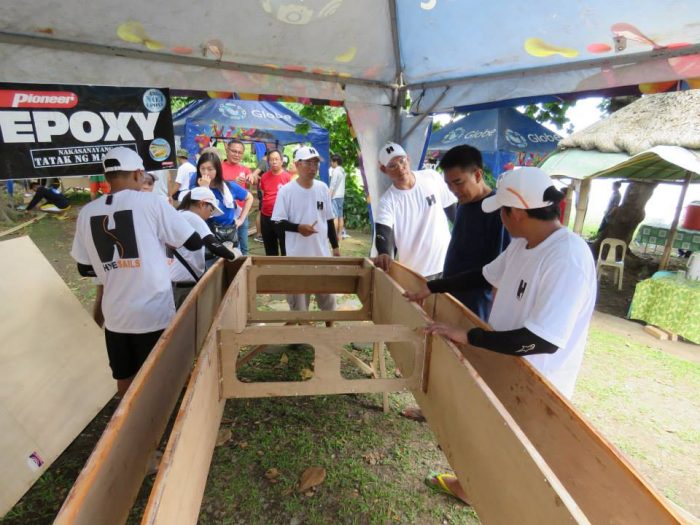
The bottom goes on. All the timber framing is minimal. It is also possible to use epoxy fillets for join up the hull panels – this means that the only solid timber gluing structure is for the deck. This photo is our third group build of 10 boats in the southernmost city of Davao, Philippines.
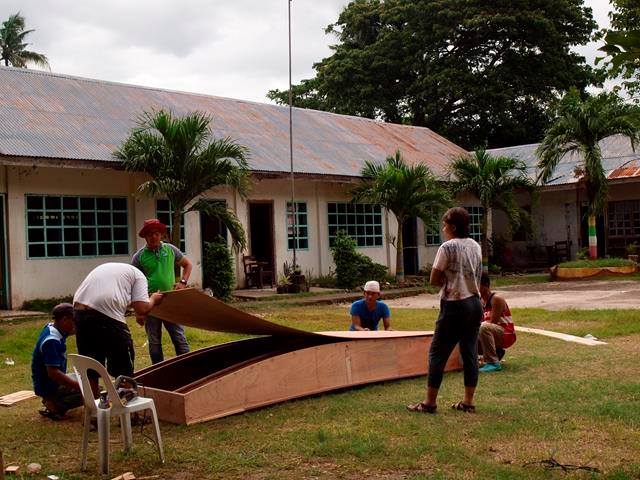
Oz Goose Basic Hull images without decks
This is just after the boat goes 3D – Centrecase and mast support structure is not added yet.
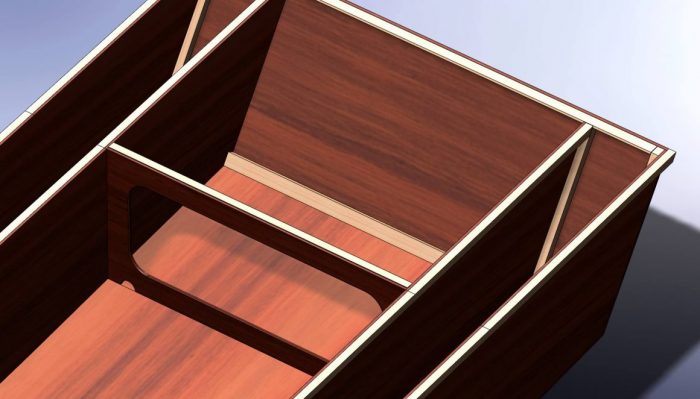
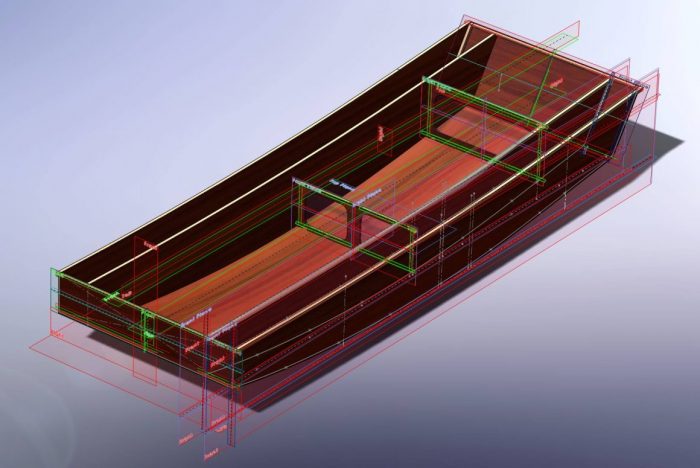
Mast step, mast partner and centrecase structure are added to the Oz Goose plywood sailing dinghy
These are major structural components taking the main sailing loads. The aim is to get the loads into the plywood structure. The framing can be quite minimal.
The centreboard case is the seat structure in the middle of the boat. The centreboard is like a wing in the water which pushes down through the slot to stop the boat from sailing sideways. With that option removed the boat will sail forwards. There are a couple of differences with the drawing. The front support is continuous right across the boat. There is a notch cut in the front top of the centrecase to allow that to happen.
Note that the seat framing is fitted to the seat top before being fitted – this view below is the seat fitted as per normal but then the seat top removed to show the framing under. In reality it cannot happen as it is for the illustration only.
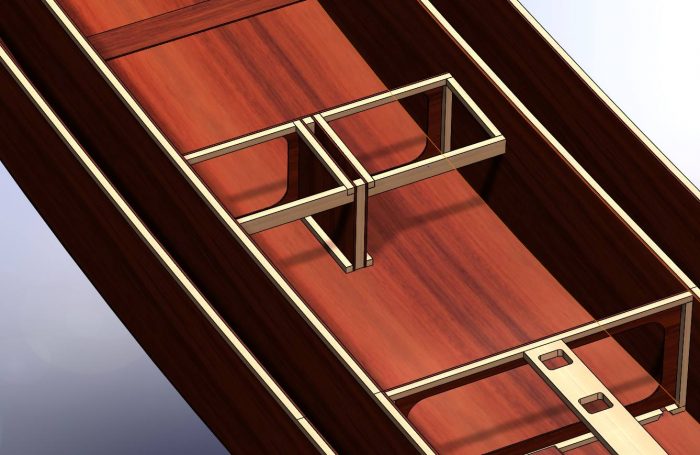
The mast partner is the upper part that transfers mast loads into the deck. The mast step is in the bottom of the boat and locates the base of the mast.
A clearer view of the partner and step after the seat top is fitted to the Oz Goose
The front mast hole in the deck is for the full size rigs – the standard 80sq ft lug (available from Duckworks made by our Really Simple Sails) or the 82sq ft homemade triangular sail.
The back mast hole is for a Junior rig or to allow taller sail options. If using one of the two inexpensive standard sails you don’t really need the back hole. So after the deck plywood is added only the front hole is cut out in most cases.
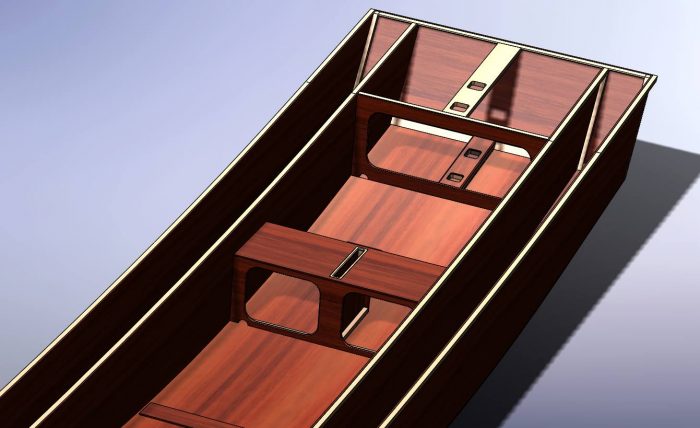
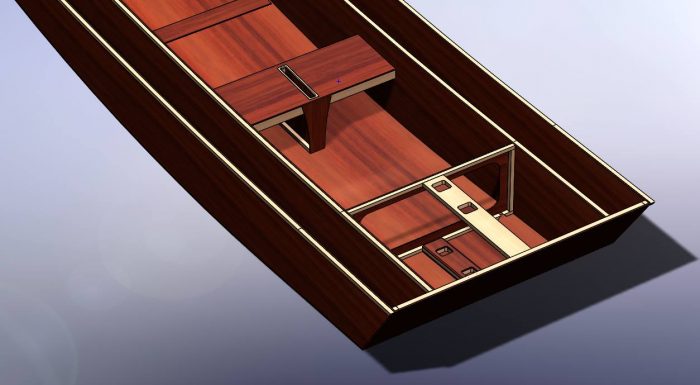
Decks are fitted to the Oz Goose sailing Dinghy.
The decks don’t just keep the water out. They distribute the high loads of the centreboard and mast into the rest of the boat. The twin airboxes down each side make the boat virtually unsinkable as well as being massive beams to prevent the boat from twisting under sailing loads.
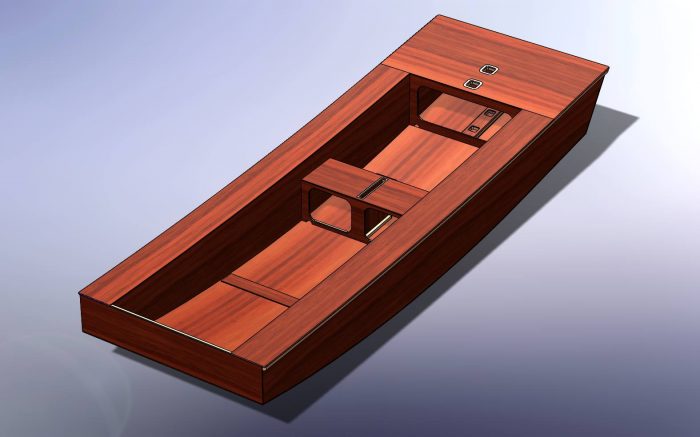
The mast is added to the simple OzGoose hull and it starts to look ready to sail
Next we focus on some other useful building details – but this is how the full sailing package starts to look with rudder and centreboard in place.

Sail and boom should be higher. It is on the actual boats!
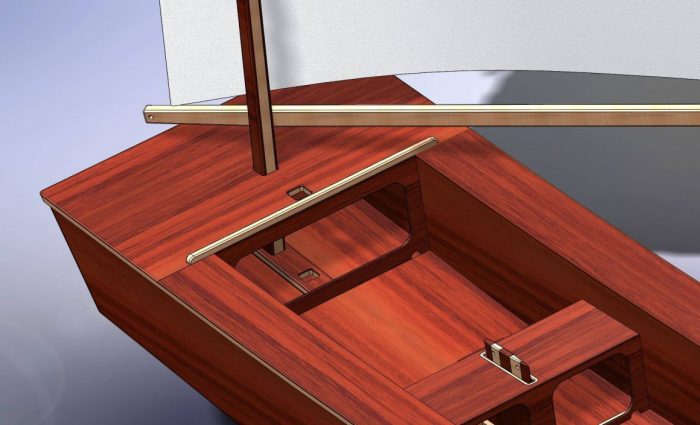
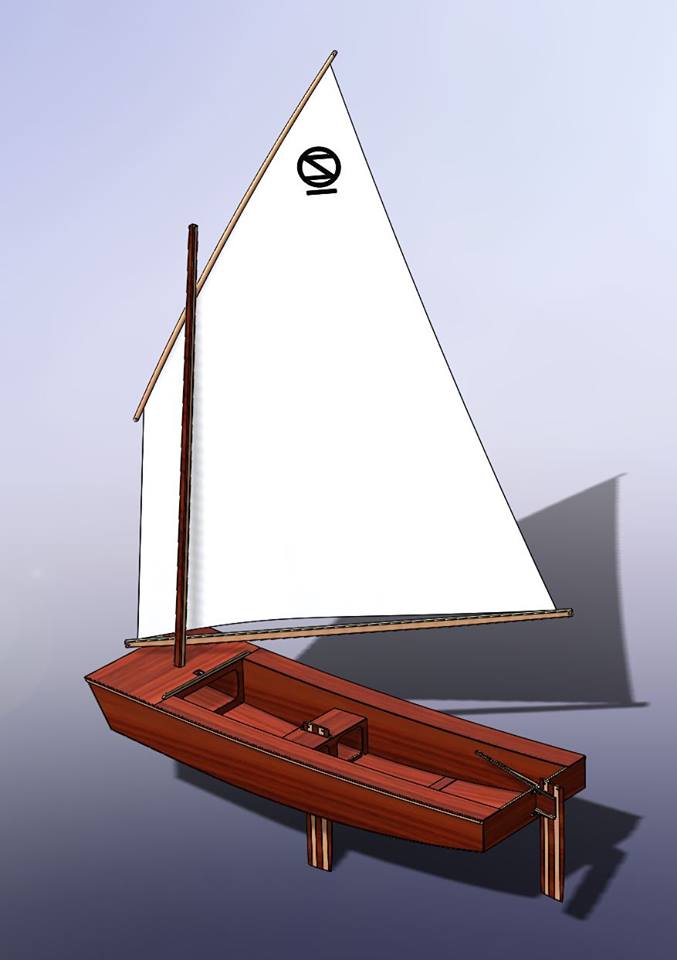
Rudderbox and Tiller for Oz Goose and many other sailing dinghies
Amongst racing boats who are interested in accurate steering and robust rudder setups the traditional swinging rudder is just about dead. The rudderbox we use keeps the blade vertical for light steering with the rudder at any level.
anyone who has tried to sail with a swinging rudder even a little bit swung back knows how much load you have to fight – not an issue with this setup. Which is why performance boats have almost entirely moved away from swinging rudders.
The steering forces for the Goose type rudder are fingertip light whatever depth the blade is set to and whatever the boat is doing.
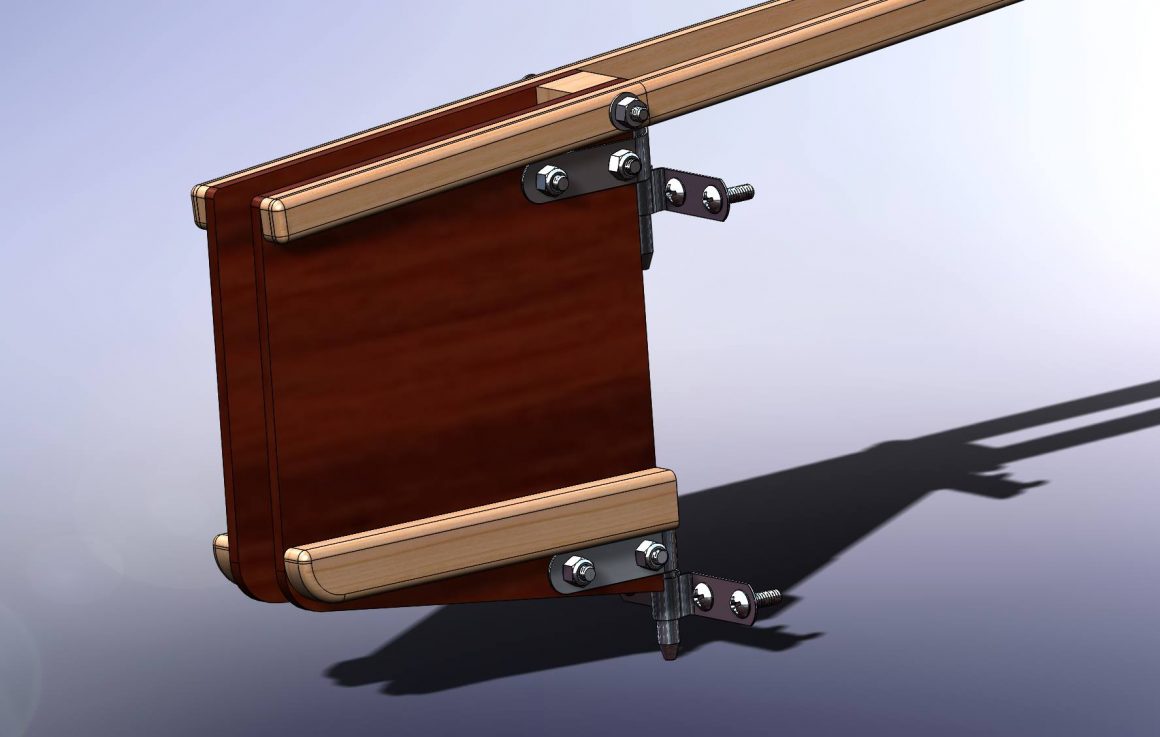
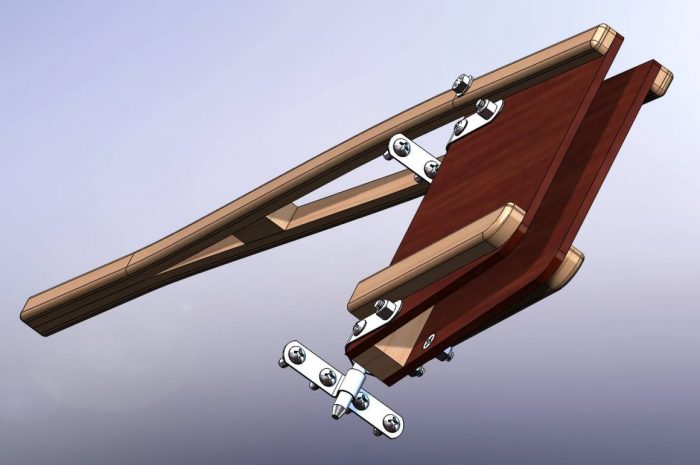
The rudderblade will still knock back and sometimes a bit up if it hits something. When you pass over the obstacle the rudderblade will pop back down again. The rudderbox it open backed and the rudder retained with shockcord/bungey which pulls the blade forward.
The bolts shown in this drawing are ESSENTIAL. In particular the one through the tiller/rudderbox juncture. Forget that and the rudderbox will break on the first outing.
One more recent mod is that we add another through bolt through the front end of the lower timber stiffener.
We also like to use a continuous pin for the rudder pivot/attachment. Less likely to fall off the boat and much stronger because of distributed loads. Normally a 1/4″ or 6mm pin.
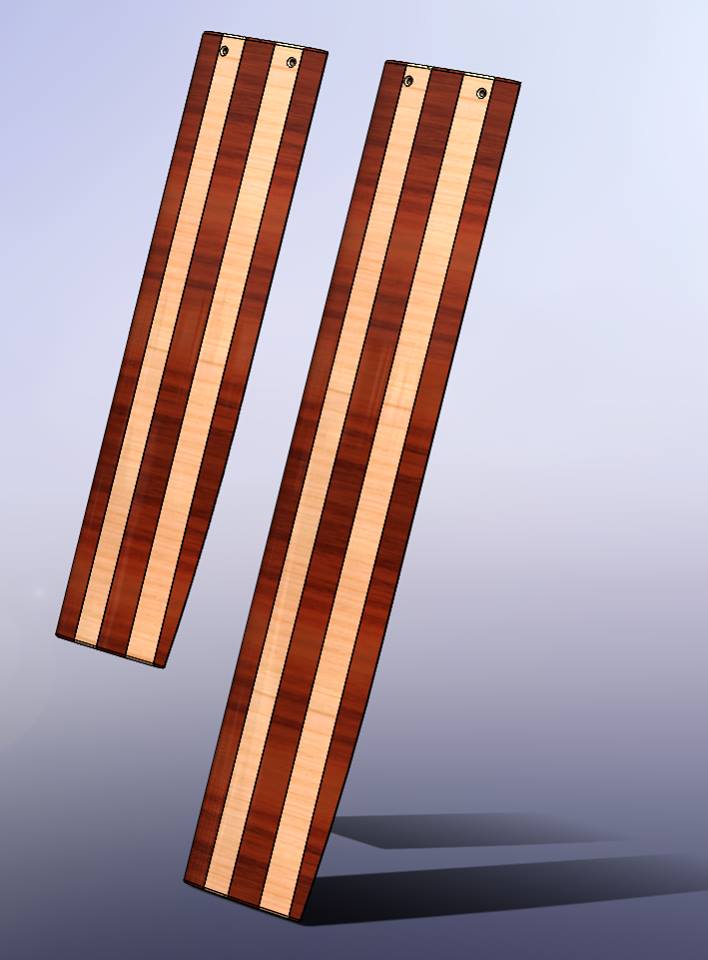
Centreboard and rudder are simplified shape created by Aerodynamicist Neil Pollock
This is a neat method using two simple templates. The foil will sit flat on the table while being shaped allowing greater accuracy. Some taper is easy to organise too.
I have a contrarian view about foil shape. There have been boats win national championships for long periods using Laminar Flow sections where the boat speed and chord of the foil are far too low to hit the Reynold’s numbers where those shapes have lower drag.
I strongly suspect that accuracy of section is much more important than the section chosen. These home made foils are far more accurate than most manufactured foils and take just a day to knock out. Accurate sections add about 10 percent to upwind VMG compared to something that looks right but is not made with templates.
We have a section on cheaply rigging boats too here.
And a video of Goose Rigging. It takes about 10 minutes from unloading to sailing.
More information about the OZ Goose sailing dinghy
For information on Building and sailing an Oz Goose
- BUILDING VIDEOS -Our Step By Step How to Build an Oz Goose Sailboat
- Building the Oz Goose sailboat for peanuts
- Some of the sailing performance of the Oz Goose
- Video – one of our Regattas – 17 boats – this year 32 boats!
- How the Oz Goose goes together – CAD drawings
- Ropes sizes and Fittings needed for the Oz Goose and a Supplier