All the Knots and Knot videos needed for rigging the Oz Goose and many other sail boats for best sailing performance. And they make packing up easier too!
This relates to the Oz Goose Lug Sail Rigging page here.
Cutting costs without cutting performance. And no special bits needed if you know a few knots.
There are just a few knots to learn. Part of the reason is that because we can’t buy sophisticated fittings in the Philippines we have found simpler and cheaper ways that cut out a lot of expense. By replacing manufactured parts with spectra rope as far as possible.
WITHOUT losing any performance.
The first time you rig your lug rig sailboat there are quite a few knots. But after initial rigging you only need to tie either three or four knots to go sailing.
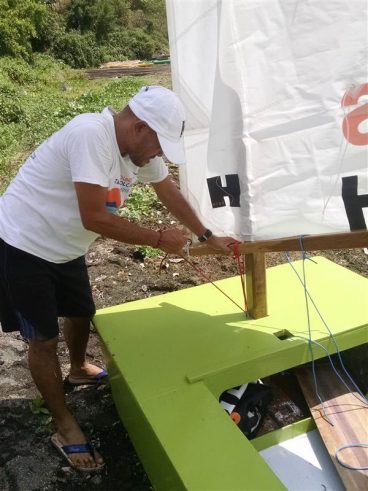
These cheaper methods can be used in other countries of course.
Look at the Oz Goose rigging page for more details of the actual rigging setup …
There is also a video for rigging the Oz Goose
And a list of rope sizes lengths and fittings
Some of these knots are semi permanent and don’t get untied
Remember the goose lugsail takes something like 5 minutes to rig. So a lot of these knots are tied once and then left.
There are two ways these knots are used.
- Intial Rig – When rigging the boat for the first time. These knots are left in place until the time for major maintenance comes up. These locations have “Initial Rig” written beside them
- Rigging for the day’s sailing – the knot gets used every time you go sailing and is undone at the end of the day. These are the knots you will have to tie and untie every time you go sailing. I’ve marked them in red.
So counting, there is a count of four knots that are regularly tied and they are three different knot types when going sailing for the day.
To rig the boat initially there are five knot types and quite a few knots to tie. You can see the balance lug rigging page here.
Figure eight knot (called the eight knot in the Philippines)
The purpose of this knot is to stop the rope pulling through a hole.
- The end of the mainsheet where you handle it to stop the mainsheet unravelling if you accidentally drop it.
- Downhaul loop in deck – Initial rig
- Traveller for mainsheet – Initial rig
- On the halyard to stop it from pulling out of the halyard cleat hole – initial rig.
- Loop at top of mast for main halyard turn around – initial rig
- Rope to hold tiller extension to tiller – initial rig
- Rope handles for centreboard and rudder blades – initial rig
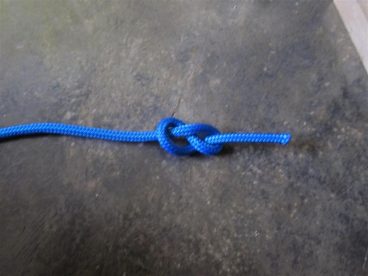
Reef Knot (sometimes called the Square knot and interestingly the Flemish Knot.)
The reef knot is to join two ends of a rope to make a loop. It doesn’t slip.
- Mainsheet blocks (Pulleys) to boom – initial rig
- Loop on Yard to attach halyard – initial rig
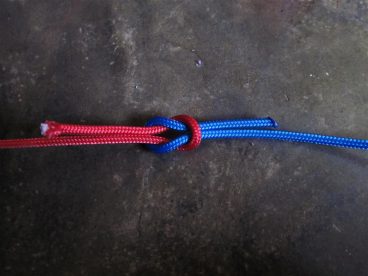
Bowline
The most wonderful knot. It makes a strongfixed size loop that doesn’t slip or shrink but can be easily undone.
- Attach halyard to front end of the yard
- Attach hand held end of mainsheet to the hiking strap
- Attach mainsheet to boom and sail at back end – initial rig
- Tie corners of sail to the yard and boom – initial rig
- Attach preventer/”bleater” around boom at front end – initial rig
- Attach hiking strap using a lacing – initial rig
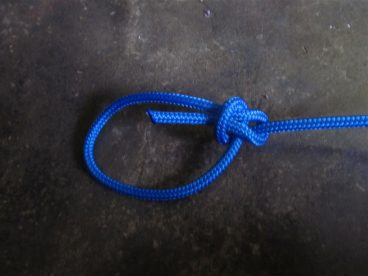
Half Hitches. To tie off a rope with tension and a fixed length.
The thing that half hitches do is allow you tie off a rope with lots of tension in it or pulling it to desired length and wanting it to stay there. For tension applications tying the half hitches, and actually increases the tension a bit with the tying off.
A little trade secret … it is OK to use two half hitches to tie off a tensioned rope. Three is overkill, but still acceptable. If you see someone do four then you can think quietly to yourself “amateur”.
Because this knot is for tension it mostly gets used in daily rigging.
- Tying the corners of the sail to the spars – you get the tension and then tie off with half hitches – initial rigging
- Tying the tension in the downhaul
- Tying the preventer/”bleater” to the correct length.
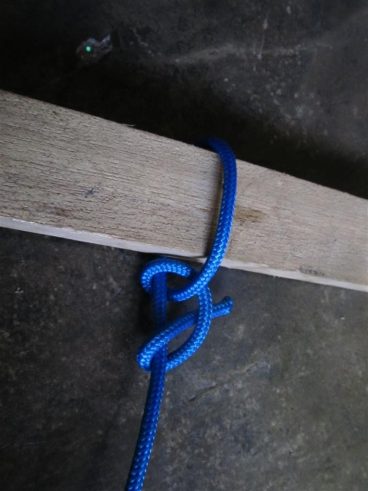
Clove hitch – not a very reliable knot without a figure 8 knot or another type of locking knot … like a half hitch. But it is fast and easy way to tie something around a post quickly.
The clove hitch ties a rope to a post or spar. It’s weakness is that any backwards and forwards action can make it creep undone, letting a bit of rope length go every time it goes through a pull relax cycle.
Its super advantage is combined with a figure 8 knot in the end the clove hitch will pull super tight so doesn’t like to slip around. It jams in the right place.
- Tie downhaul around the boom – Initial Rig.
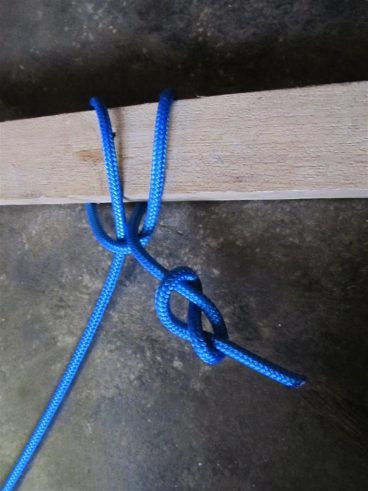
This is the basic video, but note that we tie a figure 8 knot in the rope end first as per above. Then you hold the long end of the downhaul and wiggle the knot backwards and forwards so it slips until the figure 8 knot it tight against the clove hitch.
And that is just about all you need.
See the detailed rigging page that will work with balance lugs, standing lugs and lateen sails here. There are ways for more adjustability for racing. There are also other ways that keep the sail better under control during raising and lowering when you are far from land and alone.
But these are simple and the cheapest way to rig the boat quickly without any need for extra parts at all.
The total number of parts we use on our geese are
- 3 Mainsheet blocks/pulleys
- Stainless steel ring at the top of the mast for the halyard
- Plastic horn cleat to tie off the halyard
- Rudder fittings
And they go better than fine.

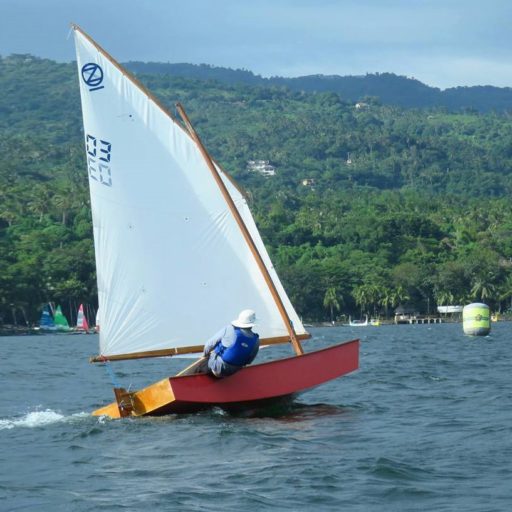
More Oz Goose Information
For information on Building and sailing an Oz Goose
- BUILDING VIDEOS -Our Step By Step How to Build an Oz Goose Sailboat
- Building the Oz Goose sailboat for peanuts
- Some of the sailing performance of the Oz Goose
- Video – one of our Regattas – 17 boats – this year 32 boats!
- How the Oz Goose goes together – CAD drawings
- Ropes sizes and Fittings needed for the Oz Goose and a Supplier